
Get Started with Scrivener: Tips for Beginners
Writing, Beginner Writing Tools, Scrivener Tips
How Tech-Challenged Writers Can Finally Get Started with Scrivener
If you’ve ever opened Scrivener, stared at all the buttons, and quietly closed it again, you’re not alone. Many tech-challenged writers feel overwhelmed by this powerful app. The good news: you don’t need to be “techy” to make Scrivener work for you. With a few simple steps and a focus on only the basics, you can turn Scrivener into one of your most helpful beginner writing tools.
Tech-Challenged Writers: You’re Exactly Who Scrivener Can Help Most
Many tech-challenged writers assume Scrivener is “too advanced” for them. In reality, its biggest strength is helping you break big, messy projects into small, manageable pieces. That’s not a tech skill; that’s a writing survival skill. You don’t need to understand every feature. You only need to learn a handful of basics and ignore the rest until you’re ready.
Think of Scrivener as a digital three-ring binder. Instead of flipping through paper sections and sticky notes, you click through folders and documents. If you can open a file and type, you already have enough skills to start. The rest is about learning where things live and which features actually help you write, not distract you.
💡 Pro Tip for Tech-Challenged Writers: Treat Scrivener like a simple word processor for your first week. Extra features are optional, not required.
How to Use Scrivener: Start with Just Three Areas
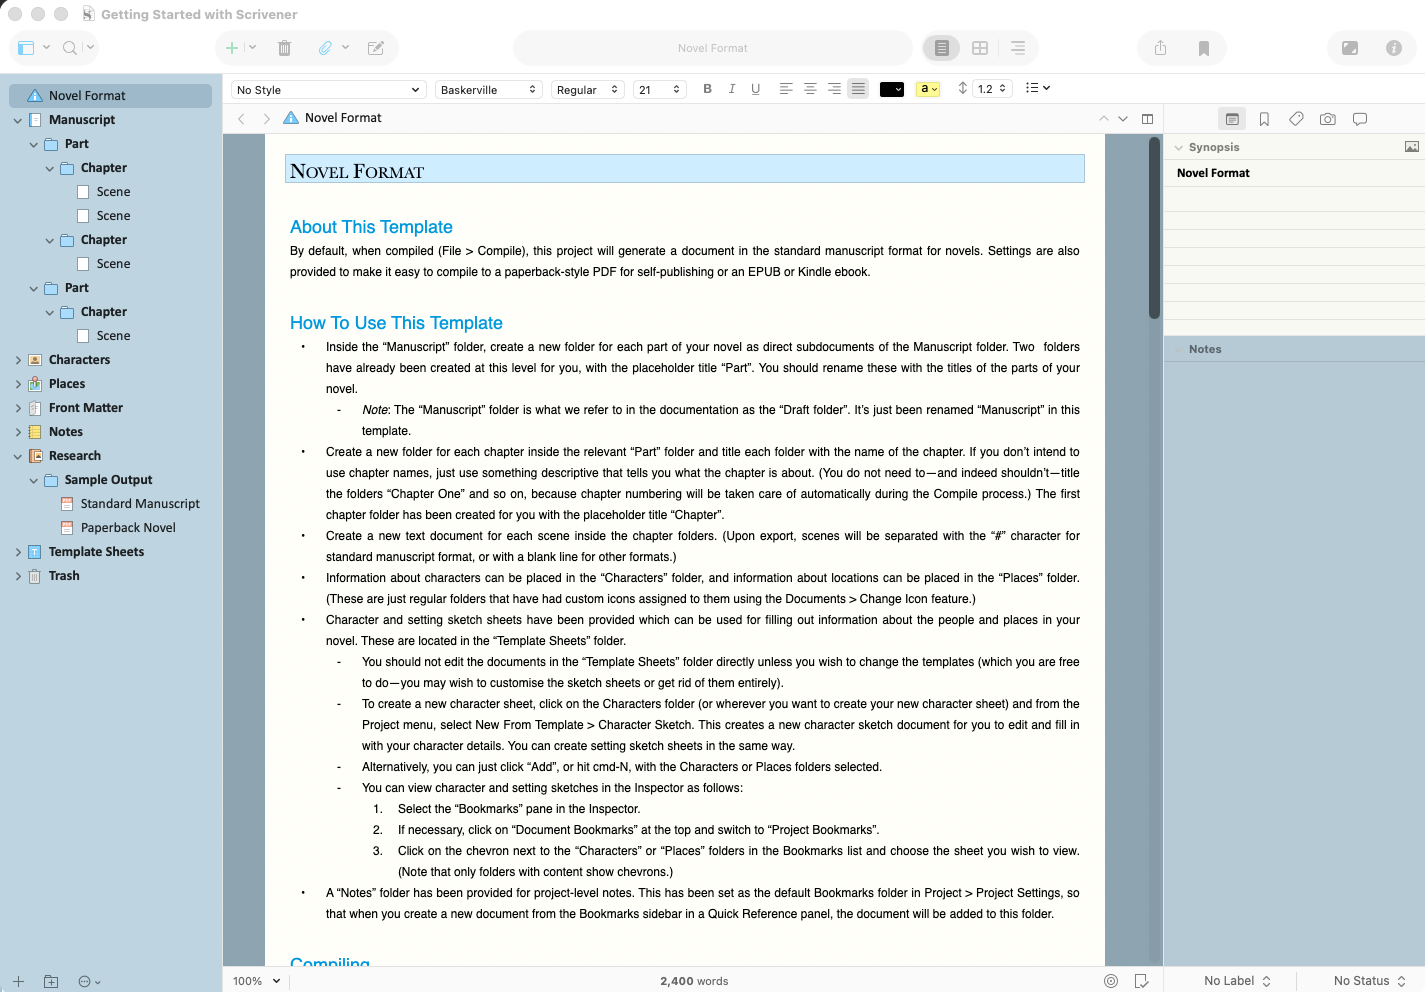
When you open Scrivener, you’ll see three main parts: the Binder on the left, the Editor in the middle, and the Inspector on the right. For now, you only need to care about the first two.
The Binder (left column): This is your table of contents. Each folder or document is like a chapter, scene, or note. You click here to move around your project.
The Editor (middle): This is where you type. It’s your main writing space, just like a regular word processor.
To create a new project, choose a simple template such as “Blank” or “Novel.” Don’t worry about picking the perfect one. You can change it later, and for most tech-challenged writers, the simplest option is the best starting point. Once the project opens, click on the document called “Untitled” (or “Chapter”) in the Binder and start typing. That’s it—you’re officially using Scrivener.
Scrivener as a Beginner Writing Tool: Build Your Project Like Lego Bricks
One reason Scrivener is such a powerful beginner writing tool is that it lets you build your project from small pieces. Instead of wrestling with a single, 200-page document, you create lots of little sections—scenes, chapters, character notes—and rearrange them as needed. This is especially helpful if technology makes you nervous. You never feel like you’ll “break” the whole book with one mistake.
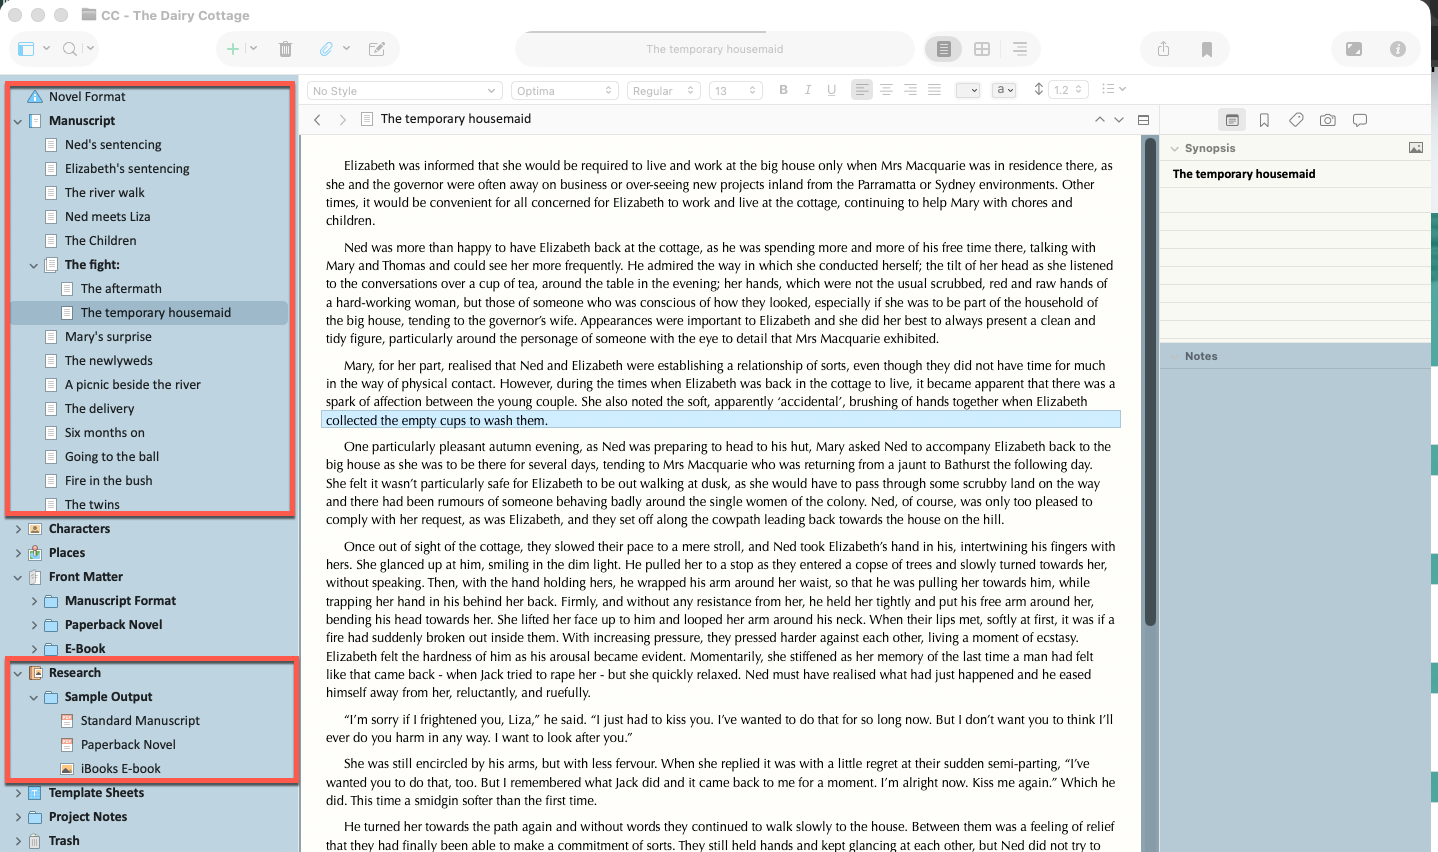
Create a folder called Draft for your main writing.
Inside it, add documents for each chapter or scene using the Add (+) button.
Add another folder called Research for notes, links, and reference material.
You can drag and drop documents in the Binder to reorder them. This is one of the most reassuring Scrivener tips for nervous users: nothing is permanent. If you change your mind about structure, you simply move pieces around instead of cutting and pasting giant chunks of text.
Gentle Scrivener Tips to Keep Things Simple
To avoid overwhelm, give yourself permission to use only a few core features at first. These Scrivener tips are designed specifically for tech-challenged writers who want results without a steep learning curve.
Rename as you go: In the Binder, slowly rename “Untitled” documents to clear labels like “Chapter 1 – Opening” or “Scene – Argument.” Clear names make navigation easier later.
Use snapshots before big edits: When you’re about to make major changes, take a “Snapshot” so you can restore the old version if needed. It’s like saving a backup of just that scene, which feels safer than editing a single, fragile document.
Try full-screen composition mode: If buttons distract you, switch to the distraction-free mode that fills your screen with just your words. No menus, no clutter—just writing.
Back up automatically: In the settings, make sure automatic backups are enabled. Knowing Scrivener is saving copies for you eases a lot of tech anxiety.
📌 Key Takeaway: You don’t have to master Scrivener; you only need to master the few features that protect your work and keep you writing.
Building Confidence: A 7-Day Scrivener Starter Plan
To make Scrivener feel less intimidating, give yourself a simple one-week experiment. Each day, spend 10–15 minutes exploring one small feature while you write.
Day 1: Create a new project and type one page in the Editor.
Day 2: Add two more documents in the Binder and move between them.
Day 3: Make a Research folder and add a note or copied article.
Day 4: Rename every document and folder with clear, simple titles.
Day 5: Try full-screen composition mode for a short writing sprint.
Day 6: Take a snapshot before revising one scene, then compare versions.
Day 7: Rearrange your scenes in the Binder to test different story orders.
You Don’t Need to Be Techy to Let Scrivener Support Your Writing
For tech-challenged writers, the most important shift is this: Scrivener isn’t a test of your computer skills. It’s simply a tool that holds your words, ideas, and structure in one place. By focusing on a few core actions—creating documents, organizing them in the Binder, and backing up your work—you can enjoy the benefits without feeling buried in options.
Start small, be patient with yourself, and let Scrivener grow with you. Over time, you can explore more advanced Scrivener tips, but for now, your only job is to open the program, choose a simple project, and write the next sentence. The technology will quietly support you in the background—exactly what the best beginner writing tools are meant to do.